How to Dry-Age Beef at Home

posted on

November 1, 2019

dry-age-meat.jpg

Dry-aged beef is flavorful and tender. However, it may be hard to come by if you don’t live by a quality butcher or an authentic steakhouse. Purchasing it from these vendors can be expensive and inconvenient.

If you want to start enjoying dry-aged beef from the comfort of home, read on to learn how to do it yourself to experience the flavors you’ve been missing out on!

What is Dry-Aging Beef?

Dry-aging is a process done after the beef animal has been harvested. The process is meant to enhance both the meat’s tenderness and flavor.

The enhanced flavor comes from two specific processes:

- The cultivation of bacteria and mold (not the harmful kinds)
- A reduction in moisture

The reduction of moisture creates a piece of meat that’s more concentrated in flavor. The bacteria and mold cause the meat to have a nutty flavor.

Keep in mind that dry-aged beef isn’t for everyone. Some food connoisseurs prefer the taste of regular beef, as it doesn’t have the intense nutty flavors that dry-aged beef has.

If you’ve never had dry-aged beef before, consider trying it at a local restaurant or meat market. Visiting one of these places will allow you to determine if you like it.

It’s best to try out dry-aging at home once you know you enjoy dry-aged beef, as the process at home can be time-consuming.

CTA-Grass-Fed-Beef-v1.2.jpg

What’s the Difference between Dry-Aging and Wet-Aging?

Maybe you’ve heard these terms thrown around but are unsure of what they mean.

You’re likely more familiar with wet-aging, as this is the process used in beef purchased from grocery stores. Wet-aging involves vacuum sealing beef, which is the same method that’s used to prevent freezer burn when freezing beef.

Wet-Aged Beef:

  • No oxygen involved
  • Minimal enzymatic changes
  • Bloody taste


Dry-Aged Beef:

  • Oxygen involved
  • Noticeable enzymatic changes which alter the beef’s flavor
  • Richer and more complex flavors


Which Is Cheaper: Dry-Aged or Wet-Aged Beef?

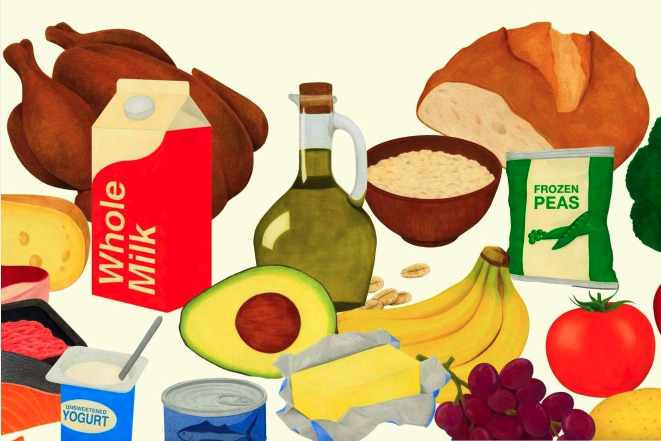
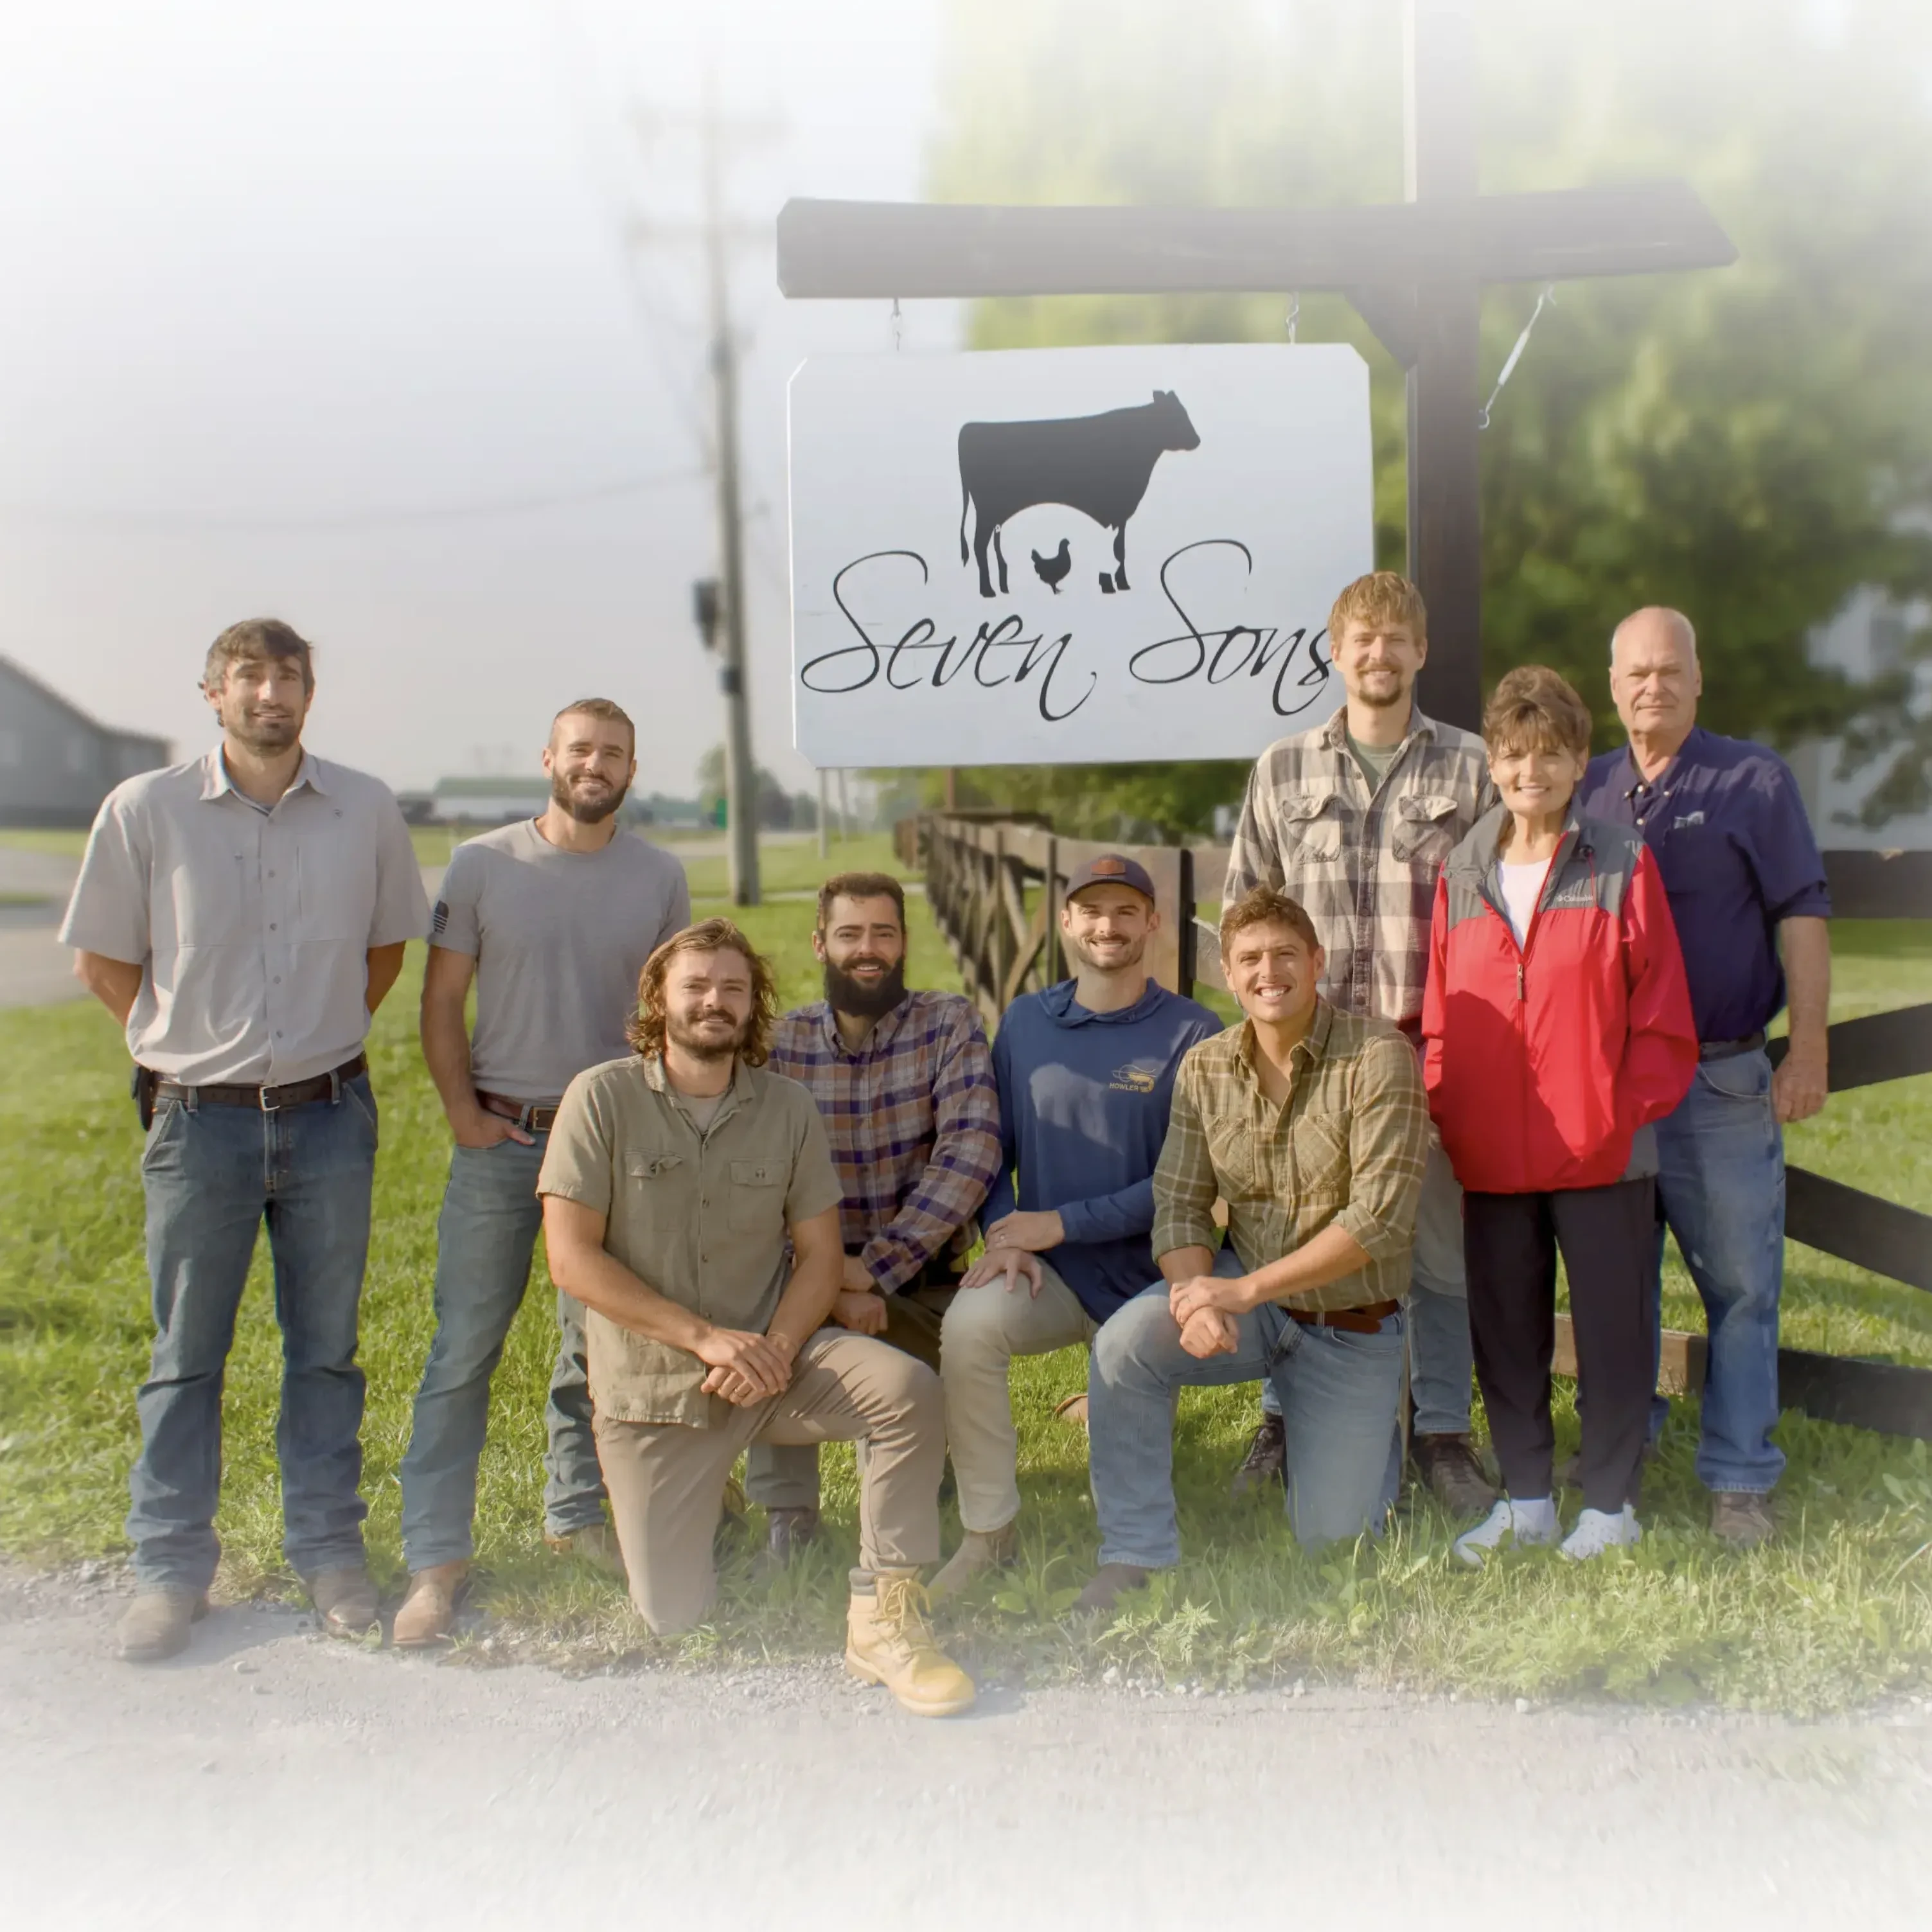
As previously mentioned, you’re more likely to be familiar with wet-aged beef, as that’s what most of us have encountered at supermarkets, and it's what we carry here at Seven Sons Farms.

Generally speaking, wet-aged beef is less costly to produce, and the process is easy. It does not require as much time or equipment. Plus, you’ll lose almost no product throughout the process.

When it comes to dry-aged beef, you’ll find that it’s more expensive. It requires more work and time to make, and you’ll need special equipment. It’s also more costly because of the amount of product you end up losing.

This is because of the evaporation and trimming involved in the process.

If it’s more expensive and time-consuming, then why do people prefer this option? Well, it’s a classic that people have enjoyed for centuries. Many prefer its taste and find the extra cost and effort to be worth it.

Read on to learn everything you need to know about dry-aging your own beef.

What Equipment Do I Need to Dry-Age Beef at Home?

This process will require some time and patience on your part. Be prepared with the right equipment.

Basic Things You Will Need

A refrigerator. While we recommend getting a dry-aging refrigerator, your normal one will work just fine. However, keep in mind there’s a catch: the refrigerator you choose should be used for dry-aging only.

Don’t use it to store beer bottles, condiments, and other miscellaneous items. A multi-purpose fridge with other items stored in it can mess up the flavor of your final beef product. Opening and closing your fridge a lot can also disrupt the final results.

Also, be mindful of your fridge size and how much meat you plan on preparing. A fridge that’s too small can cause inadequate airflow, while one that’s too large can give you trouble with humidity levels.

Seven-Sons-Farm-Free-Tour.png

Find a refrigerator that meets your preparation needs. Consider getting one with a glass door, so you can check on your beef’s progress without opening the door and interrupting the aging process.

A fan. This may sound like a strange tool to have in a kitchen, but you’ll need it to dry-age meat. Ensuring you have proper air circulation is important to the setup process. Without it, you won’t get a tasty final product.

A small standalone fan will work just fine. You can get a small battery-operated one. Or, one with a power cord will work, as long as the fridge door can close securely. Just make sure you sterilize your fan before it goes in the fridge.

A Substitution for the More Adventurous

While a standard home refrigerator should get the job done, one isn’t as consistently cold as a refrigerator meant for dry-aging. If you’re feeling particularly adventurous, consider investing in a dry-aging refrigerator. Consider how a dry-aging refrigerator outperforms your standard home fridge:

It keeps its contents cold. To dry-age meat successfully, you need low temperatures. Ideally, the temperature range should be between 34.7 degrees Fahrenheit and 35.6 degrees Fahrenheit. This small range doesn’t leave much room for error.

Even if your home fridge has electronically-controlled thermostat regulation, it won’t be able to precisely remain in these temperature constraints. A dry-aging refrigerator is designed to meet the specific temperature requirements for dry-aging meat.

It controls the climate. Temperature isn’t the only factor to consider. You also want to have a sterile environment for dry-aging beef. A dry-aging refrigerator sterilizes and controls the humidity to prevent the development of unhealthy mold.

It has other purposes. If you decide to take a break from dry-aging meat, this type of refrigerator can be used for other purposes. For example, you can keep herbs, vegetables, and fruits fresher for longer in the consistent temperatures and sterilized conditions that this fridge offers. Just make sure you disinfect the fridge in between uses.

Getting this kind of refrigerator will grant you a dedicated space for dry-aging beef. You’ll never have to worry about clearing out your kitchen’s main fridge and dealing with cross-contamination.

What Beef Should I Use?

Now that you know what you need to get started, you might just grab any meat you can find at your supermarket. Before we get into the actual process, know that the type and quality of meat matters. Keep these factors in mind when purchasing your cuts.

The Best Pieces of Meat to Use

One of the most important parts about dry aging beef is using the right size cut. While you can age individually cut pieces, we do not recommend it. It’s best to use large cuts because they will lose water due to dehydration.

Larger whole muscles (also referred to as subprimals) are usually a safe bet. Examples of meats you could use include a strip loin shell or a large rib roast with at least three ribs.

It’s also important for you to choose cuts with a thick exterior layer of fat. When you trim the exterior at the end of the process, you’ll only be cutting away chunks of fat. This prevents lots of unnecessary waste and allows you to enjoy your beef to the fullest.

The presence of fat is also important because it contributes to flavor. Avoid pieces that are too lean, as you won’t have enough fat for a great-tasting finished product. Try to stick to USDA Prime cuts. This is the minimum amount of marbling you’ll need.

Another factor you should consider is whether or not the cut is on- or off-the-bone. If the cut is on-the-bone, you can easily cut away meat during trimming without losing any.

Here is our Recommendation: Prime Rib Roast or Beef Tenderloin

Is Higher-Quality Meat Better?

You already need additional equipment such as a dedicated refrigerator to dry-age beef. Is it worth it to invest in higher-quality meat? The answer is yes!

You don’t want to skimp out on quality when it comes to picking your meat. A top-grade cut will properly absorb flavors and create a better overall taste.

Be sure you are getting your meat from a good source. It’s recommended to use ethically sourced, grass-fed beef for dry-aging beef.

How Do I Tell if I am Buying Good Quality Meat?

As mentioned above, you want to look for pieces with a certain amount of marbling and fat on the exterior. These are elements you can easily spot.

To ensure you buy meat of good quality, use your best judgment. Look out for brown or gray edges. Steer clear of cuts that are wobbly and wet instead of dry and firm.

Talk to Your Local Butcher or Farmer

When it doubt, don’t be afraid to ask for help. Your local butcher or farmer should be your go-to person.

They are experts when it comes to meat and can help you with your buying decision. Let them know that you’re planning to try dry-aging at home. They can give you their recommendations and maybe even provide you with advice on the actual process. They can also ensure that you are taking home only the highest quality of pieces.

Don’t Just Buy It Off The Shelf

Of course, buying meat off the shelf from your supermarket might be the easiest option. However, it won’t offer you the best dry-aging results.

For one, lax regulations can make it difficult for you to know exactly what you’re getting and where it’s coming from. The expiration dates don’t always mean anything. Overall, the inferior quality can make it difficult to achieve good results from the dry-aging process.

What is the Process of Dry-Aging Beef at Home?

Dry-aging beef is well-worth the labor and time. However, it’s no walk in the park, so be sure you’re aptly prepared.

The Setup

Disinfect your fridge. Use a mixture of bleach and water to disinfect the fridge’s internal surfaces.

Ensure the humidity range of your fridge is between 75% and 85%. If your fridge is below this range, some excess product shrinkage may occur.

If the humidity levels are above 85%, spoilage is more likely to occur. In most areas of the U.S., it’s easy to maintain appropriate humidity levels. If your area has particularly dry or moist air, you’ll need a humidity control on your fridge.

Ensure the temperature is controlled. Your fridge should be between 29 and 40 degrees Fahrenheit (-1.6 to 4.44 Celsius). The ideal range is between 36 and 39 degrees Fahrenheit (2.22 to 3.88 Celsius) so you don’t spoil expensive products or become sick from eating spoiled meat.

Obtain a piece of meat that’s already been dried. To ensure it was done properly, we recommend obtaining this piece of meat from a local dry-aged meat retailer.

Spread this piece of meat along the inside of your fridge. This speeds up the development of your fridge’s microclimate. You can still dry-age beef without doing this part, but the microclimate will take a lot longer to form without this assistance.

The Cooking Process

Though the setup is important, the cooking process is what you’ll be looking forward to. When your beef has dried for the appropriate amount of time, consider your taste buds. Also, take the taste buds of the people you may be cooking for into account.

Palpability is subjective, as people will prefer different tastes and textures.

In a perfect trial run, all of your aging parameters will be correct and no spoilage will be produced. The only thing that may get in the way of a perfect piece of meat is the rind, or the hard outer shell that develops during the aging process.


This rind will not soften during the cooking process. It needs to be removed before the cooking process begins. Freely cut off the rind, making sure to not leave any of it behind. If you leave any rind left, you’ll ruin an otherwise perfect dry-aging experiment.

As you’re trimming the rind away, you may notice patches of discoloration. These are normal in most cases and safe to eat. If you’re unsure if they’re safe for consumption, feel these spots to see if they are soft. If they are particularly firm, cut them away to avoid food poisoning.

FAQ

Here are some questions we haven’t covered so far:

"Is there an easier way?"

If this sounds like a lot of work, you’re not alone! Many people find this process to be difficult and time-consuming, leading them to not bother with it at all.

Of course, if there’s an easier way, you’re going to want in on it. Unfortunately, there isn’t.

Some websites suggest that this process isn’t as complicated as most make it out to be. They suggest that “shortcut” methods will work just as fine.

For instance, some say that you can simply line cuts in a pan with a paper towel or cheesecloth. Then, you put the pan in the refrigerator for around 3 to 7 days.

There are several reasons this method is ineffective. While the cheesecloth will dehydrate the meat, it won’t age it. The enzymes need at least 2 weeks to tenderize the fibers properly. The beef needs at least 3 weeks to develop complex flavors.

When it comes to dry-aging beef, it’s best not to take shortcuts. You’ll only end up frustrated and left without the product you want. While the process might seem tedious, it definitely pays off. You, your family, and your guests will end up with a delicious, properly-aged piece of meat.

"Is mold okay?"

Some people might be wary when they hear mold is involved in this process. After all, mold is bad for us, right? We stay away from it in the produce section and throw out bread as soon as we notice its presence on it.

When it comes to dry-aging beef, however, mold is completely normal and even essential. Basically, we want it because it creates the nutty taste that we are aiming for. Think of the mold that many types of cheese have that create highly-sought after products.

If at any point you notice black mold, cease all aging activities. If there’s one thing you learned from this article, it’s this—black mold is bad. Be sure to throw out any meat in your fridge and give it a good deep-clean. Then, you try again, adjusting your process accordingly.

"What are the proper preparation and cooking techniques?"

Know how to prepare and cook your dry-age meat is very important. It’ll ensure that your hard work pays off and keeps everyone safe.

Preparation: A rind forms during the aging process. Be sure to remove it as it won’t soften when cooked.

Cooking: Be sure to cook at least the outside of your meat to the proper temperature. The high heat will kill off harmful bacteria. You don’t need to cook the inside as it is sterile. Keep in mind that the bone, however, is not and can breed bacteria. Either cut away the bone altogether or roast it separately and serve with the cut.

"How long do I typically age beef for?"

This answer depends on what you are looking to achieve. If you just want to increase tenderness, four weeks should be fine. After a month, it won’t get any more tender to a point that’ll you actually notice it.

If you are looking to increase the meat’s flavor profile, you’ll need to let it age a little longer. A month is the minimum amount of time for noticing any hints of the traditional dry-aged flavor. If you are looking for more complex notes, leave it in your refrigerator for six to eight weeks.

"Why does dry-aged beef taste better?"

Dry-aged beef doesn’t necessarily taste better. In fact, some people prefer the taste of wet-aged beef, as it doesn’t have an overwhelming nutty flavor.

For those who do opt for dry-aged beef over its wet-aged counterpart, it’s usually because of its increased tenderness and flavor caused by oxidation, enzyme breakdown, and bacteria. Who knew science was responsible for how your food tastes?

Make Your Beef Taste Better!

If you want to try out dry-aging for yourself, consider getting some high-quality pasture-raised beef from Seven Sons to get started.

Product Guides

More from the blog

America's BIGGEST Nutrition Policy Blunder

Good morning,Today we look back in time...The year was 1992. I was six years old.That was the year the iconic Food Pyramid was introduced to the public. It quickly became seared into the minds of Americans as the symbol of a healthy diet for the next 30 years.Schools taught it.Doctors referenced it.Food companies built entire marketing campaigns around it.I remember walking the grocery store aisles as a kid and seeing a barrage of marketing claims on cereal boxes and Pop-Tarts that proudly read, “Part of a healthy diet.”Looking back now, that claim feels almost unbelievable.The original Food Pyramid never bothered to distinguish between refined grains and whole grains. And it treated all fats as bad.So Americans were told, for decades, to build their diets around foods that were often highly inflammatory and damaging to gut health. Since that day, here’s what followed: Obesity rates doubledType 2 diabetes skyrocketedUltra-processed food consumption surgedMore than 70% of American adults are now overweight or obeseNearly 90% of healthcare spending now goes toward treating chronic disease When people ask me what I think about the recently introduced “Upside Down Food Pyramid,” my response is simple: Why did it take more than 30 years to turn this thing on its head? In my opinion, the 1992 Food Pyramid will go down as one of the great policy blunders in modern American history.The USDA's updated dietary guidance is finally acknowledging what many regenerative farmers have understood for decades: It recognizes healthy fats as an essential part of a restorative diet.It emphasizes the importance of gut health, including fermented foods.It plainly states we should avoid highly processed packaged and prepared foods.It directly (and correctly) links the Standard American Diet to the wave of chronic health conditions Americans are battling. The guidelines also acknowledge that people with chronic disease, like myself, may need to adapt these dietary recommendations to their own health situation. That point is incredibly important. And one last thing.This shouldn’t be taken as a political statement.The truth is, the low-fat, high-carb diet didn’t come from one political party. It was embraced by both Democrats and Republicans. And, for more than 30 years, neither side seriously questioned whether it was working.Meanwhile, chronic disease kept rising and the industrial food system kept expanding.I’m simply thankful to see this policy finally getting turned upside down the way it should have been all along.At the end of the day, most of us don’t need a government chart to tell us what good food looks like.Real food raised responsibly.Ingredients you recognize.Meals shared around a table with people you care about.That’s the kind of food system we’re working to build here at Seven Sons.And we’re grateful to have so many of you walking that path with us.

25 Years of Seven Sons (Some OLD SCHOOL pics!) 📸

A few weeks back, at our annual team Christmas party hosted right here in the farm order fulfillment area, I took our team members and their guests on a trip down memory lane.While we served over 25,000 unique families in 2025, the truth is that our farm had VERY humble beginnings, rich with challenges, uncertainties, and failures.I’ll never forget one evening when I was probably 12 years old. Dad sat Blake and me down and asked if we’d be willing to invest the cash we had saved in glass jars to help pay for the first cattle fencing we needed to build.That was a lot of weight for young boys to carry.But we said yes.Looking back now, I never could’ve imagined that those jars of cash would one day multiply into what Seven Sons has become today.The purpose of my storytelling that night was to enrich the team's understanding of our farm's story, and celebrate 25 years of serving customers, regenerating the soil, producing nourishing, healthy food, and raising animals with care.It was a fun exercise. :)And, so, for just 2-3 minutes I invite YOU on this same journey. Take a trip down memory lane with me... The year was 1999, and Y2K (the fear of what would happen when all the computers rolled over to a new century) was on the horizon.Mom, Dad, Blake, and I worked hard to create our first-ever product, Canned Beef - a shelf-stable staple item in high demand at the time.It was the only product we sold.The good news is that it sold very well!!The bad news was that after Y2K passed without a hitch, people had too much, and demand plummeted. While we still sell our canned beef today, we had a BIGGER vision than selling one product, so we got busy innovating. In the late 1990s / early 2000s, the internet and "selling online" was just in its infancy.  Mom and I agreed that a good home schooling project would be for me to build the first Seven Sons website. (pictured above).I'm happy to report I finished my project, but I'm unhappy to report we NEVER earned a single customer through this first version of SevenSons.net.(The marketer in me now understands why. 😂)Thankfully, the spark for online marketing was ignited in me, and I continued to learn and take steps to effectively reach customers online in the coming years. Our next step was to open a self-serve on-farm store so that customers could buy from us 7 days a week, and we could support our sales beyond the few sales we'd make at farmers' markets in the area.It was about this time that I started dating my wife, Charis.On one of my early visits down to visit her family in Warren, IN, I happened to notice this shed (pictured above) on the back of her family's property. I couldn't help but notice that it looked like a pretty ideal farm store.🤔She encouraged me to ask her parents if we could buy it to start our family's on-farm store, and they gave it to us. Interestingly, Charis' grandpa has started a business with the same shed years ago, and so her parents were more than happy to see the tradition carry on.We were in business shortly thereafter... With the vision of growth and packing more and more orders over time, we built our first fulfillment and packing "room".With the mix of a refrigerator, a few freezers, and an area to weigh and package goods, we were on our way to working more efficiently. My friend, this BIG truck, affectionately called "THE BEAST," is what we used to make our first home deliveries in the area, and eventually all the way to Chicago.There were many, many days of rolling down the interstate, first with Blake, and then with my other brothers as they got old enough to make the trip. There was no A/C, so those July and August trips were especially warm. And, sometimes the trips were adventurous...One memory stands out more than most...I remember standing in the back of that reefer truck on a cold November day in Munster, Indiana. Ice and rain were coming down, and there were more than 30 families lined up behind the truck waiting to pick up their Thanksgiving orders.As I think back on that moment now, I’m overwhelmed with gratitude.Every one of those families chose to skip the grocery store.Every one of them trusted us with their holiday meal.And those choices repeated thousands of times over the years, are the reason this farm is still here today. And that brings us to our first ever team Christmas party...The impact this year for our people, our greatest asset, was strong as they could look around the room to see the now nearly 100 people enjoying a meal, playing games and leaving with some thank you gifts.Each word of this story is only possible because of the folks reading it. If you read our Manifesto, you will learn that behind the scenes of this 25-year journey, there were many hardships that nearly ended the journey.The belief, patience, good will and partnership we've received from our customers over the years means more than you know to mom, dad, my brothers and I.THANK YOU.❤️Let me close by saying that 25 years in we are more inspired than ever and the vision we have is grand.We invite you to continue on that path with us...to enjoy healthy food you can eat with confidence, and help us continue to lead for much needed change in the food systems and agriculture

A Complete Guide to Pork Cuts and How to Cook Them

From quick-searing chops to slow-braised shoulders, understanding different pork cuts and their ideal cooking methods helps you create delicious, satisfying meals every time. Whether you're grilling, roasting, or braising, each of the 12 main pork cuts offers unique flavors and textures that shine with the right technique. Quick Facts About Pork Cuts 12 main retail cuts come from four sections of the pig: shoulder, loin, belly, and legQuick-cooking cuts (chops and tenderloin) are lean and cook in under 30 minutesSlow-cooking cuts (shoulder, butt) have more marbling and need 6-8 hours for tender, fall-apart resultsCook ground pork and sausage to 160°F, while whole cuts should reach 145°F internal temperature, with a 3-minute restHeritage, pasture-raised pork is darker pink, firmer, and richer in flavor than conventional pork Pork is a versatile meat rich in protein, vitamins, and minerals. It’s a great addition to a healthy diet, and you can cook it in various ways. Which cut of pork you choose and how to cook it, depends on a few things.  Before deciding which cut is right for you, consider the source. Pasture-raised, heritage breeds produce more flavorful pork with better nutritional content[1] than standard grocery store products.  But can you tell the difference between pasture-raised pork and industrially produced pork? Yes! Our pork is firm and darker pink in color (indicating the animal was pasture-raised). Pork meat that is pale in color, soft, or damp was most likely factory-farmed. As a bonus, all our pork is sugar-free and free from GMOs, nitrates, and antibiotics. Now that we’ve sorted that out, let’s talk about the different pork cuts!  Originally published in 2024, this article was updated and republished on November 27th, 2025. What Are the Main Pork Cuts? When you're shopping for pork, you'll encounter retail cuts from four main sections of the pig: the shoulder, loin, side (belly), and leg. Each section produces cuts with distinct characteristics that suit different cooking methods. Here are the 12 most popular cuts of pork you'll want to know about: 1. Bacon  What part of the pig: Side (belly) Bacon is a breakfast staple for a reason, and it’s our #1 selling product of all! These thin slices of pork are quick to cook–making them a great, tasty breakfast, lunch, or dinner option! We recommend frying, baking, or grilling your pork bacon until it turns dark pink and the fat is crispy around the edges. Internal temperature: Cook until crispy (approximately 165°F) Bonus: You don’t need to stop at breakfast with your bacon. Wrap a tasty filet mignon, top your favorite hamburger, or make bite-sized pieces to mix in with oven-roasted Brussels sprouts, asparagus, or Cobb salad. 2. Pork Sausage What part of the pig: Shoulder and loin Another breakfast staple – pork sausage – is made of cuts from the shoulder and loin of the pig. We season our sausage with black pepper, red pepper, rosemary, and sage to give it a rich, hearty taste.  For the healthiest option, grill or oven-bake your sausages until browned and cooked through–or fry them in a skillet for 10-12 minutes. Then, serve with eggs, in a breakfast sandwich, or with a side of sweet potato hash. Internal temperature: 160°F (ground pork product) 3. Ham What part of the pig: Hind leg Ham comes from the hind leg of the hog. Our heritage ham roast is brined and smoked by artisan butchers for a melt-in-the-mouth texture and subtly sweet flavor. Unless they say they’re ‘fresh,’ hams usually arrive pre-cooked, but you can still work some magic through crusting, seasoning, then oven-roasting them. Our recipe for maple glazed ham is a family favorite.  Internal temperature: 160°F Our recipe for maple glazed ham is a family favorite. 4. Bone-in Pork Chops What part of the pig: Loin Bone-in pork chops are a premium cut sourced from the loin of the pig. They’re renowned for their marbling, tenderness, and depth of flavor, making them a tasty centerpiece for any dinner party.  Pork chops are also versatile. You can marinate them and then toss them on the grill, sautée, or oven-roast them with herbs and spices for added flavor. And they’ll be ready in under an hour from start to finish! You can keep it simple by topping with your favorite BBQ sauce or try one of these pork chop side dishes. Internal temperature: 145°F with a 3-minute rest For something that will wow your guests, try our recipe for pork chops with pear sauce. 5. Ground Pork What part of the pig: Primarily shoulder and hind sections Cut primarily from the shoulder and hind sections, ground pork is the perfect base for meals across cuisines: Italian meatballs and pasta sauces, French casseroles, soups or stews, and much more. How you cook your ground pork will depend on what you’re making.  Internal temperature: 160°F 6. Baby Back Ribs  What part of the pig: Back and loin Baby back ribs come from the back and loin of the pig. They’re smaller and meatier than their spare ribs, and quicker to cook. You can use a dry rub or glaze with your favorite seasoning, then bake or barbecue until the meat easily pulls away from the bone. Internal temperature: 145°F minimum, though many prefer cooking to 190-203°F for fall-off-the-bone tenderness 7. Pork Shoulder What part of the pig: Upper front leg and shoulder blade area Pork shoulder is a hearty, flavourful cut of meat perfect for slow cooking, smoking, or roasting. We love putting it in the slow cooker for 6-8 hours, along with garlic, onion, and spices. When the pork shoulder comes out, it’s juicy and tender, falling apart with a touch of the fork. Internal temperature: 145°F for safety, but best when cooked to 190-205°F for pulled pork 8. Tenderloin What part of the pig: Loin muscle along the backbone Pork tenderloin is a long, boneless cut of meat from the loin muscle that runs along the pig's backbone. This cut is mild in flavor and tender, so you can cook it in a variety of ways.  Try pork tenderloin prepared in the slow cooker with a creamy garlic sauce for a simple mid-week dinner. Our pork Wellington recipe is sure to impress for a show-stopping dinner. Internal temperature: 145°F with a 3-minute rest 9. Pork Crown What part of the pig: Bone-in pork loin formed into a circle A pork crown is created by tying a whole bone-in pork loin into a circle. It’s a crowd-pleasing recipe perfect for a family gathering or dinner party. The best way to cook it is to roast it. First, rub it with garlic and herbs, then let it marinate overnight. The next day, roast it in the oven for 1.5-2 hours or until the internal temperature reaches 160 degrees. Internal temperature: 160°F 10. Pork Butt What part of the pig: Upper shoulder Despite what the name indicates, pork butt comes from high up in the shoulder of the pig. This cut is known for its marbling and depth of flavor, and it’s usually smoked or roasted to make pulled pork.  As with pork shoulder, you’ll want to rub the pork butt with your chosen seasoning before slow cooking in the oven, smoker, or slow cooker for 6-8 hours (depending on the size of your cut). Once it’s cooked, cut the skin off and shred the meat. You can serve it immediately or let the pork marinate overnight so it soaks up more flavor. Internal temperature: 145°F for safety, but best when cooked to 195-205°F for pulled pork 11. Pork Loin  What part of the pig: Back of the pig, between shoulder and leg Pork loin is a rich, flavorful cut of meat that comes from any part of the loin section. It’s larger and juicier than pork tenderloin, making it ideal for roasting, grilling, or braising.  For a quick, tasty meal, you can cut your pork loin into steaks and fry them in butter or an oil of your choice for 8-10 minutes. Alternatively, you can prepare pork schnitzels with just a couple of extra steps. Internal temperature: 145°F with a 3-minute rest 12. Pork Belly What part of the pig: Underside of the pig “Candied” Pork belly is a popular restaurant dish for a reason. When cooked to perfection, this juicy, tender cut of meat will melt in your mouth. You can see Blaine’s take on Alton Brown’s Seared Pork Belly here. Internal temperature: 170°F Frequently Asked Questions About Pork Cuts What part of the pig is ham? Ham comes from the hind leg of the pig. This large cut is typically cured, smoked, or both, which gives it that distinctive savory-sweet flavor. Our heritage ham roasts are brined and smoked by artisan butchers for exceptional taste and texture. What part of the pig is pork chops? Pork chops are cut from the loin, which runs along the back of the pig between the shoulder and the leg. Bone-in chops include a portion of the rib or backbone, while boneless chops are simply the loin muscle. The loin is one of the most tender sections of the pig, making chops a premium cut. What is the most tender cut of pork? Pork tenderloin is the most tender cut of pork. This long, narrow muscle runs along the backbone and doesn't get much exercise, resulting in exceptionally tender meat. It's mild in flavor and cooks quickly, making it perfect for weeknight dinners or elegant presentations. What are the best cuts of pork for slow cooking? Pork shoulder and pork butt are the best cuts of pork for slow cooking. These cuts come from the shoulder area and contain more connective tissue and marbling, which breaks down during long, slow cooking to create incredibly tender, flavorful meat. They're ideal for pulled pork, stews, and braised dishes that need 6-8 hours of cooking time. How do you cook different cuts of pork? Different types of pork require different cooking methods. Quick-cooking cuts like bacon, chops, and tenderloin work best with high-heat methods like grilling, pan-frying, or roasting at 400°F. Tougher cuts with more connective tissue, like shoulder and butt, need low, slow cooking methods such as braising, slow cooking, or smoking. Ground pork is versatile and can be pan-fried, grilled as patties, or incorporated into various dishes. What's the difference between pork loin and pork tenderloin? Pork loin is a larger cut from the back of the pig that weighs several pounds and feeds a crowd, while tenderloin is a long, narrow muscle that's about one pound and serves 2-3 people. Tenderloin lives up to its name as the most tender cut and cooks quickly, making it ideal for weeknight meals, whereas loin is perfect for Sunday roasts or slicing into chops. Why choose heritage, pasture-raised pork cuts? Heritage, pasture-raised pork offers superior flavor and nutrition. Our pigs spend their lives on regenerative pastures, resulting in meat that's darker pink, firmer, and richer in beneficial omega-3 fatty acids. The natural marbling in heritage breeds creates meat that is more flavorful and tender. Plus, our pork is free from GMOs, antibiotics, hormones, and added nitrates. What Will You Go For? If you’re wondering which of the different cuts of pork is best for your needs, the answer is all of them! It all depends on what you’re making.  Whatever you fancy, you’ll taste the superior quality of heritage pork products from our regenerative-focused family farm. Choose from a variety of sugar-free, heritage, pasture-raised pork cuts, delivered to your door. If you're wondering what could you do with the other parts of the pig, read our pork offal guide and explore our selection of pork organs. Footnotes1. https://practicalfarmers.org/research/fatty-acid-comparisons-of-grain-and-forage-fed-pork/

Your Custom Box
Empty Box

Get started by adding a product to your custom box

Start Shopping
Subscribe & claim $36.75 in savings
Subscribe & Save
What you get when you subscribe to your box:
  • 5% savings site-wide

  • Free item with each delivery (choose below)

  • $25 store credit to use on your next order - Available to first-time subscribers only

  • 100% Customizable - Pause, skip, or cancel anytime with no penalties

Customize Your Frequency Customize Your Free Item
- Ground Beef -
Ground Beef

$11.75 FREE

- Breakfast Sausage (Sugar Free) -
Breakfast Sausage (Sugar Free)

$12.36 FREE

- Bacon infused Burgers -
Bacon infused Burgers

$10.15 FREE

Before You Get Started

📍Enter your email and postal code so we can confirm delivery and create your account

Email
Postal code

Great! We're going to deliver your next order to !

Sorry, we couldn't find that postal code!

Check delivery availability

Your postal code helps us to provide the most up-to-date product and delivery information.

Nearby?

,

Need it shipped?